
Guide on Painting Over Varnished Wood
Welcome to Dependable Painting & Remodeling’s guide on painting over varnished wood, a topic that resonates with many homeowners looking to refresh the look of their homes.
If you’re scrolling through Pinterest, Instagram, or YouTube for home renovation ideas, you might have encountered various methods and tips for painting over surfaces that are already varnished.
Perhaps it’s that old chair in the corner of your room or the kitchen cabinets that have seen better days. Varnish, with its glossy finish, adds a protective layer to wood but can be a challenge when it comes to applying a fresh coat of paint.
In this comprehensive guide, we’ll delve into everything you need to know about this process, from the basics of sanding and priming to the final coat, ensuring that your painting project brings a new lease of life to any room in your house.
Our approach is to offer practical information and step-by-step instructions to make this task as straightforward as possible. We understand that dealing with varnished surfaces can be daunting, so we’re here to simplify it for you.
Whether it’s a DIY project or something you want professional help with, we’re here to guide you through each part of the process, ensuring that your wood turns out beautiful.
Wondering whether to tackle this project yourself or seek professional assistance? Check out our insights on Should You Paint Your House Yourself or Hire a Pro?
Are we ready to dive into the world of transforming varnished wood with a fresh coat of paint?
Understanding Varnished Wood
Before diving into the painting process, it’s crucial to understand what we’re dealing with. Varnished wood is a common feature in many homes, found in items like furniture, trim, and kitchen cabinets. Varnish not only enhances the wood’s natural beauty but also provides a protective layer against scratches, water damage, and wear. It’s this glossy finish that can make painting over varnished wood seem intimidating at first.
Varnish, typically made from a combination of resins, oil, and solvents, creates a durable, hard surface that protects the wood beneath. This protective layer, while beneficial for preserving the wood, presents a unique challenge when it comes to adhesion of new paint. Essentially, the slick, glossy surface of varnish repels rather than accepts new coatings, such as paint.
Understanding this, it becomes clear why simply slapping a new coat of paint on top isn’t the best method. Painting over varnish without proper preparation can lead to a host of problems: poor adhesion, uneven coverage, and a paint job that quickly deteriorates. The key to a successful painting project on varnished surfaces lies in thorough preparation.
This preparation involves steps to ensure that the new paint adheres properly and lasts for years to come.
For more insights on the versatility and application of different paint types, including whether exterior paint can be used indoors, explore our blog post Thinking Outside the Box: Using Exterior Paint Inside – Yay or Nay?.
In the following sections, we’ll break down these steps in detail, providing you with valuable tips and instructions to ensure your painting job is a success. Whether you’re tackling a small area or an entire room, understanding the nature of varnished wood is the first step towards transforming it with a fresh, new look.
Why Preparation is Key
Preparation is the cornerstone of any successful painting project, especially when dealing with varnished wood.
Here’s why meticulous preparation is non-negotiable:
- Adhesion and Durability: The glossy surface of varnish is designed to repel, not absorb. Without proper preparation, paint struggles to adhere, leading to peeling, chipping, or flaking over time.
- Smooth Finish: Preparing the surface ensures that any imperfections are addressed, resulting in a smooth, professional finish. It’s about giving your paint the best foundation to shine.
- Longevity: A well-prepared surface means a longer-lasting finish. You want your hard work to stand the test of time, not just look good for a few weeks.
Steps for Preparation:
-
Inspecting the Surface: Check for damage, wear, and the extent of the varnish. Look for areas that might need repair or special attention.
-
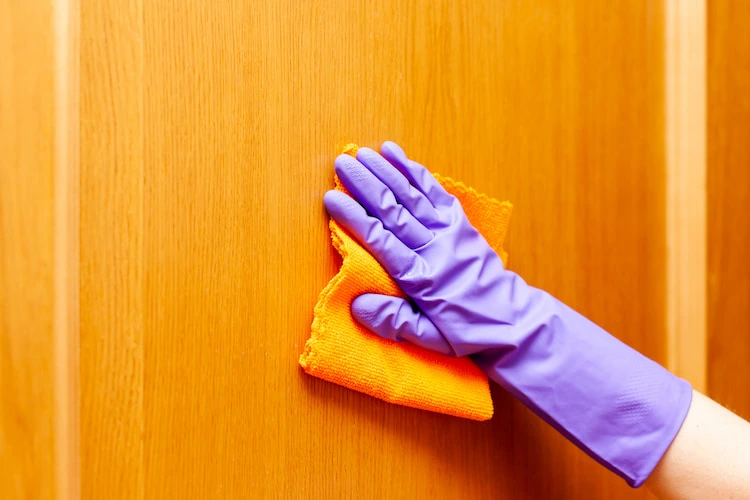
Cleaning: Remove dust, grime, and oils that could prevent paint from adhering properly. Use a mild detergent and warm water, ensuring the wood is completely dry before proceeding.
-
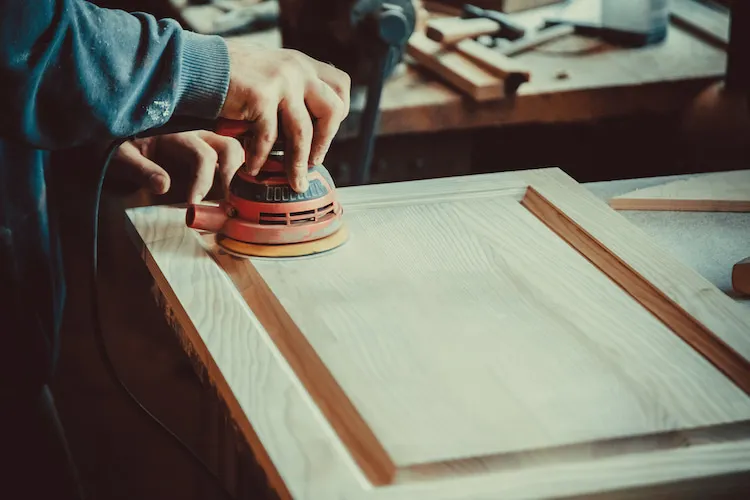
Sanding: Sanding is crucial for breaking down the gloss of the varnish. Use fine-grit sandpaper to gently abrade the surface, creating a texture that paint can grip.
-
Priming: Apply a high-quality primer designed for use on varnished surfaces. This step is pivotal for ensuring that your paint adheres and offers an even, consistent base.
-
Taping Off Areas: Use painter’s tape to protect areas that you don’t want to paint, like hardware or adjacent walls.
Tools and Materials:
- Sandpaper (Fine-grit)
- Primer (Specific for varnished surfaces)
- Painter’s Tape
- Cleaning Supplies (Mild detergent, Rag/Cloth)
- Safety Equipment (Gloves, Masks)
Remember, skipping any of these preparation steps can compromise the entire painting job. Each step plays a vital role in transforming your varnished wood into a masterpiece of color and finish.
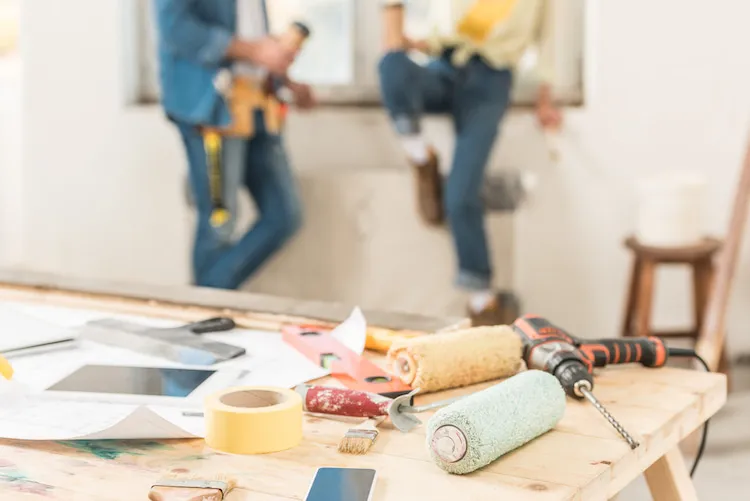
Materials and Tools Needed
For a successful painting project on varnished wood, having the right materials and tools is essential. Here’s a comprehensive list to get you started:
Materials:
- Primer: Choose a high-quality primer suitable for varnished surfaces. Oil-based primers are often recommended for their adhesion and sealing properties.
- Paint: Select the type of paint based on your project’s needs. For high moisture areas like kitchens or bathrooms, oil-based paints are ideal. For other areas, water-based acrylic or latex paints offer excellent coverage and color variety.
- Topcoat/Sealer: A topcoat or sealer protects your paint job from scratches and wear, important for high-traffic areas or furniture.
Tools:
- Sandpaper: Fine-grit sandpaper for sanding down the varnished surface. Coarser grits may be needed for thick or uneven varnish layers.
- Cleaning Supplies: Mild detergent and a cloth or rag for cleaning the surface. A bucket of water for rinsing.
- Painter’s Tape: To protect areas you don’t want painted, such as hardware, edges, or adjacent walls.
- Paint Brushes and Rollers: Choose brushes and rollers suitable for your paint type. Smaller brushes for detailed areas.
- Safety Gear: Gloves, masks, and possibly goggles for protection during sanding and painting.
- Drop Cloths: Protect floors and furniture from paint drips and spills.
Preparation Area:
- Ensure a well-ventilated workspace.
- Cover items or surfaces nearby to protect from dust and paint.
Having everything on hand before starting your project streamlines the process and reduces unexpected hardware store trips. For a detailed list of all supplies needed to tackle any painting project like a professional, check out our guide on Paint Like a Pro: Your Comprehensive Interior Painting Supplies List.
Next, we’ll dive into the step-by-step process of painting over varnished wood, where each of these materials and tools will come into play.
Step-by-Step Process of Painting Over Varnished Wood
Now that we have our materials and tools ready, let’s dive into the step-by-step process. Follow these steps for a seamless and effective painting experience:
Step 1: Inspecting and Cleaning the Surface
- Inspect: Examine the wood for any damage or imperfections. Fill holes or cracks with wood filler and let them dry.
- Clean: Use a cloth and mild detergent to clean the surface, crucial for removing dust, oils, and grime.
Step 2: Sanding
- Initial Sanding: Start with medium to fine-grit sandpaper to gently abrade the varnished surface. Sand in the wood grain direction to avoid scratches.
- Dust Removal: Wipe away all sanding dust with a clean rag for a clean surface before priming.
Step 3: Applying Primer
- Primer Choice: Select a primer compatible with the varnish and paint type.
- Application: Evenly apply the primer using a brush for corners and edges, and a roller for larger areas.
- Drying Time: Follow the manufacturer’s instructions for drying times before a second coat if necessary.
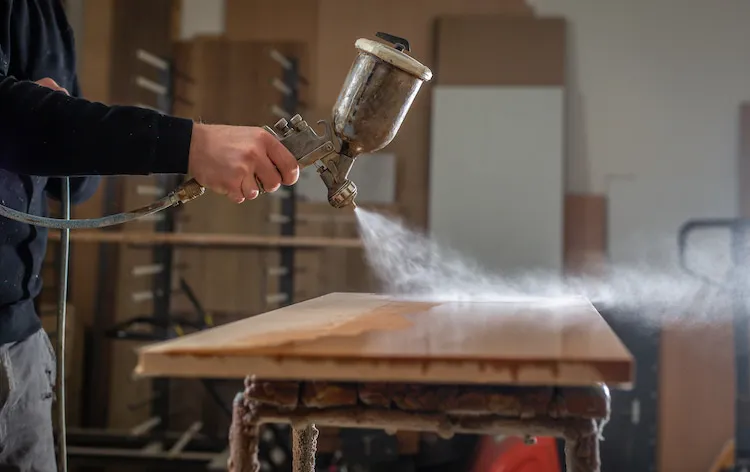
Step 4: Painting
- Paint Application: Apply the first coat of paint with a brush or roller, starting from the edges to larger areas.
- Drying: Let the first coat dry completely as recommended on the paint can.
- Additional Coats: Apply at least two coats of paint, ensuring each coat dries completely before the next.
Step 5: Applying the Topcoat/Sealer
- Sealer Selection: Choose a sealer that complements your paint type and desired finish.
- Application: Apply the sealer evenly, avoiding overloading the brush or roller.
- Drying: Let the sealer dry thoroughly as per product instructions.
Step 6: Cleanup and Review
- Cleanup: Remove painter’s tape, clean tools, and properly dispose of or store leftover materials.
- Final Inspection: Check your work for any missed spots or touch-ups needed.
Remember, patience is key in each step. Rushing can affect the finish quality. Ensure each coat is applied evenly and allowed to dry fully.
Painting Over Varnished Wood Without Sanding
While sanding is typically recommended for the best adhesion and finish when painting over varnished wood, there are alternative methods for those looking to bypass this step, especially useful for intricate details or impractical surfaces.
Using Specialized Primers
- Bonding Primers: Products like Zinsser’s B-I-N adhere to slick surfaces without sanding.
- Application: Apply directly over the clean, varnished surface, following drying time instructions.
- Advantages: Saves time and effort, while still providing an effective surface for paint adhesion.
Chalk Paint Method
- Chalk Paint: Adheres to varnished surfaces without sanding.
- Application: Apply directly onto the varnished wood after cleaning, with multiple coats for coverage.
- Topcoat: Seal with a suitable topcoat for durability.
- Benefits: Unique, matte finish, and eliminates the need for sanding.
Considerations for Non-Sanding Methods
- Durability: May not match traditional sanding and priming methods.
- Surface Suitability: Some varnished surfaces may still require sanding for optimal results.
These alternatives offer less labor-intensive options. However, the choice between sanding and non-sanding methods depends on the project specifics, wood condition, and desired outcome.
Maintenance Tips for Painted Wood Surfaces
After successfully painting your varnished wood, maintaining the fresh look and durability of the paint is crucial. Here are some effective ways to care for your painted surfaces:
- Regular Cleaning: Regularly clean with a soft, damp cloth. Avoid harsh chemicals or abrasive cleaners to prevent paint damage.
- Immediate Stain Removal: Clean spills or stains immediately with mild soap and water, avoiding hard scrubbing.
- Touch-Ups: Keep extra paint for minor touch-ups, particularly useful for scratches or chips.
- Avoid Excessive Moisture: Ensure good ventilation in moist areas to prevent paint damage. Use exhaust fans or open windows to reduce humidity.
- Protect from Direct Sunlight: Use curtains or blinds to shield painted surfaces from prolonged sunlight exposure.
- Regular Inspections: Periodically inspect for signs of wear or damage, such as peeling or cracking, for easier repairs.
By following these maintenance tips, you can ensure that your newly painted wood surfaces maintain their beauty and functionality.
Bringing new life to varnished wood through painting enhances home aesthetics and allows for a personalized touch. Whether it’s furniture, kitchen cabinets, or trim, the transformation impacts the overall look and feel of your room.
At Dependable Painting & Remodeling, we provide guidance, tools, and services for successful painting projects. We’re here to help, whether you need expert advice or professional services.
Thank you for choosing Dependable Painting & Remodeling. Check out our blog for more tips and inspiration, and connect with us on Instagram and YouTube. Contact us for estimates or discussions on your next project.
Remember, a fresh coat of paint, with proper preparation and care, can achieve a perfect finish. Happy painting!